
Are you looking for an Amazon FBA Guide to serve as a blueprint for starting your Amazon business? Then you are on the right page. It’s not a secret that AMZN is the #1 e-commerce marketplace globally. Third-party sellers have contributed to around 50% of the sold items on the platform, which means sellers make good profits here. We can say that third-party sellers contribute a major portion of the AMZ business. It is wise to educate yourself with a guide before you start selling on Amazon.
Some people say that it is tough to sell and make money on Amazon. However, there is also a certain category of people who find selling on the website quite easy. The fact is that if you are passionate and willing to work, selling online can be a breeze. But to be successful, especially if you’re trying to build your own brand on the platform, you need to understand how the marketplace works.
That’s why we have carefully created this step-by-step Amazon FBA guide – to help every beginner become successful on AMZ. In this Amazon FBA guide for starting an Amazon FBA business, we will also discuss the pros and cons of FBA. That way, you can decide if using the Fulfillment by Amazon (FBA) fulfillment model is your best bet.
Related: What to sell on Amazon FBA

Table of Contents
What is Amazon FBA?
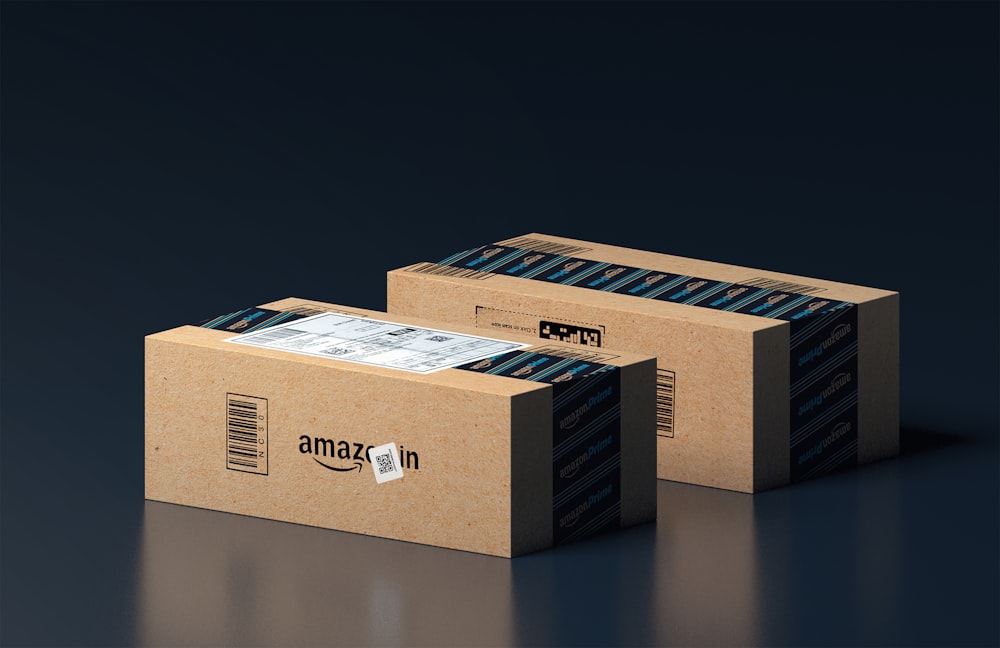
Under the (Fulfillment by Amazon) FBA program, sellers can quickly and easily fulfill their customers’ orders. By utilizing AMZ’s vast shipping and logistics network, shipping and fulfilling customer orders have never been easier.
With the FBA program, all you need to do as a seller is send your products to Amazon’s warehouse. Amazon will handle the picking, packing, wrapping, and delivery of your orders so that you won’t have to worry about anything.
Furthermore, AMZ will also handle the customer service part of your business. This means you won’t have to worry about refunds and returns anymore. With this, you can now focus on other important tasks, such as marketing your AMZN store better
If you don’t want to outsource your business tasks to Amazon, you can do everything yourself through FBM (Fulfillment by Merchant).
What is FBM?
FBM is the acronym for Fulfilled by Merchant, one of the two fulfillment options available to third-party sellers on AMZ. As its name suggests, this process involves the merchant fulfilling the orders placed in their store. Under the FBM method, the merchant is the one who picks, packs, wraps, and ships the products to the customers. This is often how online stores function, whether you intend to sell on Amazon, eBay, Etsy, or your own Shopify site.
With FBM, you are the one who takes charge of your shipping methods. This means that you control your shipping schedule and when you want to fulfill your orders. However, this also means you cannot easily negotiate with shippers for bulk shipping discounts. Since you are only shipping a few items at a time, shipping can get more expensive.
One of the biggest downsides of FBM is that you have to do everything on your own. And when your store starts getting lots of orders in, this can be very problematic. The tracking of orders alone can be a pain for many sellers, especially those who don’t have a dedicated team. Because of this, some sellers opt to leverage the network of AMZ through the service known as FBA.
Using FBA is one of the most cost-effective decisions any third-party seller in AMZN can make. However, there are also disadvantages to using FBA that you must consider before jumping in.
So, let’s take a look at the benefits and disadvantages of running an Amazon business.
Why You Should Consider Amazon FBA
There are many reasons why you should consider selling through FBA, but this does not imply that the service is without cons. Below are some pros and cons of using the service.
Pros
1. Ride on Amazon’s Credibility
Amazon already has an existing audience of over 300 million people who trust their reputation. Selling and fulfilling orders directly through Amazon via the FBA channel, saves you the stress of having to build your customer base from scratch.
2. Solid logistics network
AMZN has built a strong logistics and order fulfillment system that allows them get massive shipping discounts from large logistic firms. Small business owners may not be able to get such discounts, so using FBA will definitely save you some bucks on shipping.
3. Prime eligibility
Selling through FBA is one of the easiest ways to become prime eligible. Being prime eligible means that you get to sell to AMZN prime subscribers; a large network of loyal AMZN customers. Free and fast shipping is one of the incentives that Prime subscribers get, and of course, that would cost a lot. However, with FBA, AMZN bears the free and fast shipping costs for you. So, you get to enjoy access to a larger audience without worrying about shipping costs.
4. Less business costs
The Fulfillment by Amazon business model is economical. Fewer expenses are incurred because you don’t need to worry about leasing or purchasing a warehouse, hiring personnel, or managing shipment operations. Additionally, the price of shipping via FBA is cheaper than it would be if you had to haggle independently over shipping costs.
5. Increased chance of winning Buy Box
Although Amazon has never fully disclosed the criteria for winning the Buy Box, we do know that FBA sellers receive priority from Amazon. So if you sell, your chances of winning the Buy Box are higher. You have a distinct advantage over other merchants as long as you aren’t directly competing with Amazon.
Cons
1. May be cost-intensive
First of all, FBA is not free. You have to pay for every service that you use in this program. From the packing tape to the bubble wrap, everything is charged for by AMZ. And sellers on a tight budget might not be able to cover the expenses. Yes, the service may not be as expensive as the costs you’ll bear independently. However, there are times when using Amazon FBA will cost you more.
Also, it would help if you considered that using FBA means you fall under Amazon’s A-to-Z guarantee. This means that customers can easily and quickly return their orders for any reason at all. This could increase your return and refund rates, hurting your sales.
For instance, if you sell heavy or slow-moving goods on Amazon, your delivery costs can be greater. So, before making a selection, it’s wise to research the storage and fulfillment expenses for your product category. To calculate your FBA seller fees with some degree of accuracy, you can utilize an Amazon FBA calculator.
2. Stringent product prep requirements
AMZN has strict product prep guidelines and requirements and it can be very tiring to prepare and package your products in accordance with the specifications. You will be charged a packing and preparation cost if you don’t do it correctly and Amazon will handle it for you.
In our opinion, the pros of using FBA far outweigh the cons, so using the service is definitely a great idea. The service can free up your time to do other things, such as building more business opportunities. If you value your time more than anything else, using FBA as your fulfillment method makes a lot of sense.
However, the decision is ultimately yours. If you decide to sell on Amazon through FBA, you can follow the steps outlined below to start your business.
3. Dependence on Amazon
Relying solely on Amazon for your sales can make your business vulnerable to any changes in Amazon’s policies, algorithms, or fee structures. If Amazon decides to prioritize other sellers or categories, your sales could be negatively affected.
4. Quality Control
Amazon’s fulfillment centers are responsible for handling and packaging your products. While they generally do a good job, there’s always a risk of mishandling, incorrect labeling, or shipping the wrong products to customers, which could damage your reputation.
Choosing a Business Model
The first step to learning how to sell on Amazon FBA is to choose a suitable business model. There are different business models, but you must be intentional about choosing one that suits your needs. Here’s a brief breakdown of AMZ’s business models and how they work.
Amazon Business Models

- Private Label: The private label model requires sellers to source products directly from manufacturers. But in this case, the products are manufactured based on your specifications; they also carry your brand name, not the manufacturers’. This model is best if you want to build your own brand and sell your own products on Amazon.
- Wholesale: Here, you purchase products in bulk from manufacturers and then sell them on AMZ at retail prices. Unlike the private label model, where you sell products under your brand name, you sell existing, already-branded items under this model.
- Retail Arbitrage: This business model is best for people who have only a little capital and want to resell products for a profit. You’ll have to source products from online/physical retail stores, then resell them at a markup price.
- Dropshipping: Under this model, you act as a middleman between a supplier and customers, so you will not have to purchase items or make any capital investment. You purchase products on behalf of customers and get the supplier to ship the order directly to the customer.
- Handmade: This business model allows you to create beautiful, handcrafted, customized designs for sale. It is best suited for creatives who want to make money from selling their designs on AMZ.
Step-by-step Guide for Starting an Amazon Business
Starting an FBA business is one of the easiest things to do. You can set up your business with ease if you follow the six simple steps listed below.
Step 1: Create an Amazon Seller Account
The first step to joining the Amazon marketplace is to sign up on Seller Central, so you must have an Amazon seller account.
Create a seller central account if you haven’t created one already.
There are two types of seller accounts—the individual Amazon seller account and the professional Amazon seller account. So, what are the differences between the two?
An individual seller central account can be registered for free, although sellers who choose this Amazon seller account will have to pay a $0.99 selling fee per sale. Also, certain features, such as using APIs and third-party tools, are prohibited. Restricted categories are also not accessible to individual sellers.
The professional seller account requires you to pay a monthly subscription amounting to $39.99 to register. But it also unlocks many features for sellers, such as access to third-party tools and an API. More importantly, it also allows you to sell in restricted categories, pushing your income generation.
Since this is an Amazon FBA Guide, we’ll give you a pro tip: choose an individual account if you are going to sell less than 40 items per month and a professional account if you sell more than 40 items per month.
After choosing your seller account, all you need to do is follow the subsequent procedures. This includes providing the required details, such as bank account, identification, etc. Your account will be created after this. Then we can go to the second step.
Step 2: Find a Profitable Product and Create Your Listings
Product research is the next important part of selling on Amazon. If you want to make sales, you have to take out time to carry out in-depth product research to find low-competition and high-demand products. Afterward, you’ll have to create your product listings so you can start selling.
To do this, you can go to the “Inventory” on the top of your screen and select “Add items.” Once done, you can search for the product you are selling by the product name or the product’s barcode. If the product is not yet on AMZ’s database, or if you want to sell private label products, then you’ll have to be the one to create the first listing for this product.
After this, you need to add important product information like price and description. This is also the part where you need to decide if you want to opt for FBA or go for FBM. Since this is an Amazon FBA guide, the subsequent steps will only apply if you opt to fulfill your orders through FBA.
You will get a welcome message, and you are done with this step.
Step 3: Convert your items to FBA items.
If you have already chosen the option of FBA, why is this step necessary? This is because you can use FBA for only selected items. You don’t have to use FBA for all the products you sell on Amazon.
Once you have fulfilled this process, your listings will be removed from this list until your inventory reaches AMZ’s fulfillment center.
Once you have converted your inventory to FBA products, you have two options to choose from. You can either go for FBA label service or opt-in sticker-less, commingled inventory.
For new items, sellers can choose sticker-less, commingled inventory. The service means they can mix your items with the matching units of other sellers within your product category.
Under the label service, they put a label on your items for you. You can opt for this if you don’t want to print your own stickers.
After this process, you will have two options. If you are selling only one product you can choose “convert & send” and “convert only” if you are selling more than one item.
Your items will appear in the “Amazon-Fulfilled Inventory”.
Step 4: Create an FBA Shipping Plan
Now is the time to create your shipping plan. For the shipping plan, you need to enter the address of the origin and the packing type of the products. This is a straightforward step, and you need to follow the instructions given.
After you have added your shipping plan, you can add your items now. You can now add all the items that you want to sell on Amazon. Ensure you fix your selling price in a way that accommodates all the important expenses, including the shipping costs.
Step 5: It’s Time to Ship Your Products.
Practically, this is the last step of your selling plan. If you have done everything properly, you can now ship your items to the warehouse. When you ship your items to the warehouse, you must follow their guidelines and protocols. If you don’t follow these guidelines, your items will be rejected and won’t be accepted at the fulfillment centers. To know more about the packing guidelines for sending items to fulfillment centers, check this link.
Once you approve your shipment plan, all you need to do is purchase your shipping from Amazon. Just find out how much your package weighs.
Drop them off at your preferred carrier for shipment once you have pasted the labels on them.
Step 6: Sell Your First Item on Amazon
This is practically the culmination of all the hard work you have done before. This is the time you wait and watch. Once you are done with your listing and have sent your products to AMZ, the final step is to make some sales. You can make some sales by promoting your products through PPC (pay-per-click) ads. Amazon offers a paid ad service for those who want to try PPC to get traffic. Check out their PPC service here
If you are not ready to spend money on ads yet, don’t fret. You can still get some people to your listings via organic search engine traffic. You can do this by ensuring your content is optimized for SEO by using the right keyword queries. Finding relevant keywords for your product description, title, and information is key to a better organic ranking.
Now that you have finished setting up your store, you can go ahead and start selling on Amazon. Hopefully, this Amazon FBA Guide has helped you out. Be ready to replenish your inventory once it is completely sold off on Amazon.
If you decide to use FBA, you must always have items in stock. Since sending your inventory to the designated Amazon fulfillment center may take time, you need to be a step ahead. Even before your inventory starts to run out, you should already be prepared to send the next batch. Try as much as possible to keep track of your inventory in your Seller Central dashboard.
As an alternative, you can consider using Amazon software to manage all your business tasks, including managing and tracking inventory. ZonBase is an Amazon seller tool that offers effective tools for product research, keyword research, listing optimization, and inventory management. In addition to this, the software offers personalized services that allow you to outsource your business tasks to an expert team.
Tips for Choosing Profitable Products
If you choose the wrong products, you risk losing money. And in the long run, you not only lose money but you also time and effort. So, there is so much to consider when choosing products to sell. Product research is one of the most important aspects of AMZ businesses. But only a few “how to sell on Amazon FBA for beginners” posts talk about this. Here are a few things to keep in mind when choosing a profitable product.
- Estimate the Product’s Profitability
Find Hot products and the most profitable products using our hot products tool.
The goal of starting a business in the first place is to make a profit. So, before you choose to sell in a niche or category, carry out proper research to confirm its profitability. First, find the most profitable category, then pick a product there.
You can use the “rule of 3’s” to estimate a product’s profitability. To do this, divide the price of your product into 3. One part goes to landing costs, and the other two go to AMZ fees and your profit. So, if you sell your product for $18, following this rule means that you make a $6 profit on every sale.
Landing costs cover the production and shipping costs while AMZ fees are the fees that AMZ charges its sellers. Don’t forget to include advertising and packaging expenses.
Naturally, your share of each sale depends on two things:
- How much you can charge for the product
- The fees you incur along the way.
Whatever you do, keep your profit margin between $20-$70.
- Market Demand
A product’s profitability usually depends on how much demand it has. So, in your product research process, be sure to find out about product demand.
Are people interested in the product? Can your product solve a problem for them? How many sales did it make in the past? If you answered yes to all these questions, you have this box ticked.
Next, identify how many products are exactly like yours. Then, determine if there are any opportunities for new sellers. Don’t forget to run a check on the brands in that category to see how much competition you’ll have to face. Competition is determined by the number of products and the quality of their reviews, so pay attention to reviews. You can also use competitor customer reviews to improve the quality of your product; this will, in turn, increase your chances of making sales.
Apart from these factors, you should also consider:
- Product size and weight. It’s best to choose small, lightweight products to reduce shipping costs.
- Availability of the product and ease of sourcing. You don’t want to run out of stock for months and lose your customers.
- Don’t choose seasonal products. If you do, you’ll only make sales when there’s a need for the products, so it’s best to choose products always in demand.
Wondering how to sell on the marketplace and be profitable? First, research to discover a profitable niche. Next, fix a favorable product price to cover your business expenses and secure your profit margin.
Lastly you can make use of our product research tools that give estimated monthly sales and profit using our chrome extension or browsing products using our filter with the zonresearch tool.
Understanding Amazon Seller Fees
As we mentioned earlier, Amazon FBA is not free, so you will have to pay for the services that Amazon renders for your business. These services mostly revolve around storage, fulfillment, customer service, and returns processing. Here’s a simple breakdown of the costs you’re likely to incur when you start selling on Amazon.
Inventory storage fees
Since you will be storing your merchandise in Amazon’s warehouses, you will have to pay for the space that your inventory takes up. Hence, storage fees are usually dependent on the size of the product and the product category.
There are two types of inventory storage fees – monthly and long term storage fees. The monthly storage fee is the cost of storing your inventory at a fulfillment center for a month. It calculated based on inventory volume and is deducted from your account at a particular time of the month. You should note though, that the monthly storage fees for January to September are different from those for October to December.
Unlike the monthly storage fee, you only incur long term storage costs when your inventory sits in an Amazon warehouse for more than 365 days. Long term inventory storage fees typically amount to approximately $6.90 per cubic foot or $0.15 per unit, whichever is more.
Long term storage fees are quite unnecessary and can be avoided by filing a removal order before your inventory hits the 365 benchmark at the fulfillment center. Also, avoid sending in excess inventory, to ensure that your products sell out quickly.
Check out Amazon’s updated storage fees for 2024
Fulfillment Fees
The fees you pay to Amazon for each order they pack and ship on your behalf are known as fulfillment costs. Each stage of the order fulfillment procedure carries a cost. The fulfillment fee covers the price of packing and shipping your orders as well as the customer support following the sale and goods returns.
Fulfillment fees are charged by unit and depend on the weight of the product. This fee may also vary based on the size of your goods, the state you’re in, and the kinds of tax laws in your region.
Usually, Amazon modifies its FBA fulfillment prices annually due to unexpected changes in shipping costs, packing costs, and other elements but they often maintain an updated list of fulfillment prices depending on product weight and size tiers. This will come in handy when you’re trying calculate your FBA costs.
Check out the updated Amazon fulfillment fees for 2024.
Apart from storage and fulfillment fees, you may also have to pay other seller fees like selling plan fees and referral fees.
Selling Plan Fees
There are two types of seller accounts; individual and professional accounts. Amazon charges $0.99 per item for each sale you make after registering for the individual selling plan. The fee is deducted from your Amazon account balance after the transaction, so upfront fees are not a concern.
In comparison, you will have to pay a fixed monthly charge of around $39.99 if you choose the professional plan. This fee remains in effect and is deducted from your account balance regardless of how many goods you sell in a given month. If the available funds are insufficient, your credit card will be charged.
Referral Fees
Referral fees are a commission based fee charged as a percentage of any sale you make. Referral fees remain the same regardless of your selling plan, but may vary based on product category.
Referral fees typically come down to about 8% to 45% of the product’s cost. However, the cost for the majority of categories is between 15% and 20%. Amazon charges different prices based on the volume of goods sold as well as the overall dollar sales for various categories. Purchases in the electronics category are charged 15% of the entire sales price for orders under $100 and 8% of the total sales price for orders over $100.
See the full list of Amazon seller fees.
Pitfalls to Avoid When Selling on Amazon
The competition on Amazon is stiff, and if you want to succeed there, you have to try as much as possible to do everything right. There are some mistakes you should avoid if you want to build a successful FBA business. A few of these mistakes are listed below:
Starting your business without product research
Product research is a crucial part of every Amazon business. If you want to make sales on Amazon, you have to dedicate time to discovering the products that people are interested in. One of the best ways to uncover profitable products is to use Amazon software like ZonBase.
Outrightly asking for positive reviews
Amazon vehemently kicks against sellers asking customers for positive reviews. Yes, positive reviews go a long way in increasing your chances of sales but you cannot directly request for reviews. Instead, explore other ways to get positive reviews for your business.
Not running promotions
The easiest way to get your products in front of more people is to run promotional campaigns to boost your visibility. So, if you want to make sales, run more ads and launch more PPC campaigns. You can use an Amazon PPC tool and join Amazon marketing services to do this.
Conclusion
This Amazon FBA guide focuses on helping you understand the benefits of using FBA over FBM. While FBM might be the usual way of fulfilling customers’ orders, sometimes you just can’t handle everything on your own. With FBA, you can leverage the network of AMZN and let them do the job for you.
By this time, you should have already sold the first few items listed on Amazon. If you are still confused and can’t figure things out, check out ZonBase’s all-in-one suite of FBA tools. ZonBase has various specialized tools that can help you find the best product to sell, optimize your listings, and rank high on the Amazon page.